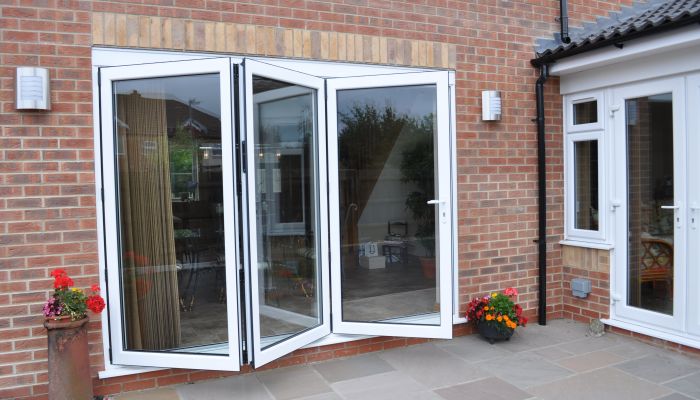
What you need to know when fitting a uPVC door
What you need to know when fitting a uPVC door
Are you ready to elevate your home’s security, energy efficiency and aesthetics? If you are, you’re in the right place. In this article we will explore the reasons why uPVC doors are a great choice for your home. We will also discuss the essential tools you will need when installing your door and how to fit your uPVC door.
Why choose a uPVC door?
Choosing uPVC for your home holds many benefits and can be a smart and practical choice for your home. The benefits of uPVC for and in your home include:
- Durability. Known for their exceptional durability, they are resistant to rotting, rusting and corrosion. This can make them ideal for many different weather conditions. uPVC doors won’t warp, crack or fade very much overtime. This ensures your door remains in amazing condition for years to come.
- Low Maintenance. uPVC doors usually require very very minimal maintenance. Wooden doors usually require regular painting and/or staining. Whereas uPVC doors only require the very occasional cleaning with mild soap and warm water to make the door look like it did the day it was fitted!
- Energy Efficiency. uPVC doors are great insulators for your home. They can give you and your home great thermal performance. This amazing thermal performance helps you to keep your home warmer in the winter and cooler in the summer. Due to the efficiency of the thermal performance in the doors, it can lead to more energy efficiency ultimately reducing your energy bills and reducing your carbon footprint as a result.
- Noise Reduction. uPVC doors can give you great insulation from outside noise.They can help to create a quiet, peaceful and calmer environment inside your home. A uPVC door is a perfect choice for your home if you live on a lively street or busy main road.
- Affordability. uPVC doors are usually more budget friendly than other doors and door materials you can opt for, such as wood or aluminium. uPVC doors offer great value for money, a long lifespan, and low maintenance requirements.
What tools will I need to install a uPVC door?
When fitting a uPVC door you will need some specific tools to make sure your installation is successful. The tools you need include:
- Measuring Tape. To accurately measure the door frame and to make sure the door fits into the space properly and perfectly.
- Level. To check that the door is plumb and level throughout the installation.
- Screwdrivers. Both flathead and Phillips screwdrivers for different screws and fasteners in the door during installation.
- Drill. A power drill with the proper bits are required for drilling holes for the screws and anchors in the door.
- Hole Saw. If the door needs additional holes for handles, locks and any letterboxes, you need a hole saw to do this.
- PVC Cleaner. This is necessary for cleaning the upvc door and preparing the surfaces for any adhesives and/or sealants, as well as making sure the door is looking clean and tidy after your installation is complete.
- Adhesive Sealant. When installing your upvc door you need high-quality adhesive sealants to bond the door frame and the opening in the building and to create a weather-proof seal.
- Shims & Packers. Shims and or packers are used to adjust the door’s frame and position to make sure that the door is level and plumb.
- Fixings & Screws. You will / may need different types and sizes of screws and fixings for securing the door frame and its hardware.
- Spirit Level. A longer spirit level or a laser level may help you to make sure the door is perfectly straight in the space and level.
- Hammer. A hammer will be required for gently tapping the shims and/or packers into place within the door.
- Mallet. A rubber mallet can also be used to tap the uPVC door *gently* into place.
- Square. This will be used for checking the corners and angles of the door and where it meets surfaces to make sure they are perfectly square.
- Masking tape. To protect the door’s finish from scratching or marks during the installation.
- Caulking Gun. For applying sealant and adhesive properly and evenly.
- Adjustable Spanner / Wrench. Used for tightening nuts and bolts on the doors hardware.
- Pencil / Marker. Useful for marking reference points and lines on the door frame / wall for reference points.
- Saw. a hacksaw or a uPVC saw may be a tool you need to trim the door frame or other parts of the door so that it can fit properly into the opening of the property.
- Screws & Hardware. Depending on what kind of door handle, door lock or any other hardware like letterboxes, you could potentially require specific screws and fasteners for these specific hardware pieces.
- Sill screws. You will need these sill screws to secure the doors sill or threshold into place.
Before you begin your installation you should make sure that you have all the tools and materials ready. It is also essential that you follow the instructions of the manufacturer and any local building codes or regulations when fitting a uPVC door to make sure you have a proper installation and installed safely.
Preparing to install the door
Properly preparing for installing your uPVC door is essential to make sure you have a smooth and successful installation process. Some steps you can take to prepare for installing your uPVC door include:
- Measuring the Opening. Start by measuring the height and width of the door opening precisely and accurately. Measure at multiple different points to make sure it is consistent. Take note of the measurements and make sure they match your door.
- Choosing the Right Door. Making sure you choose the right door for your home's aesthetic and to match the look and feel of your home.
- Gather Tools & Materials. Gather up all of the tools you will need ready for your installation. *refer back up to our list for a guide*
- Read the Instructions. Carefully read any instructions you have from the manufacturer on how to install your new door properly.
- Clear the Area. Remove any obstructions that might be in the way for a clear working space.
- Clean the Area. make sure to clean the opening of the door and the walls surrounding the door opening, this will help to remove any dust, debris and old materials for a smooth installation.
- Check the floor level. Use a spirit to ensure that the sill is level, if it isn’t level you may need to make adjustments for
- Prepare the Frame.
- Protect the Door. To prevent any marks, scratches or smashes with your door during installation. You can use masking tape or any kind of protective cover.
Removing the old door
There are different ways of removing old doors depending on what kind of door you have at the time.
uPVC Doors
There are a few tools you will need to get started on removing your uPVC door. They include:
Flathead & Phillips screwdrivers, utility knife, pry bar / crowbar, adjustable wrench or pliers, safety goggles and gloves (other safety equipment), screw / hardware container.
Removing a uPVC door can be quite simple to remove from your home. Here are some steps that you can follow to successfully remove the door:
- Removing the doors hardware. The starting process of removing the uPVC door begins with removing and unscrewing all of the hardware on your door, this includes the handles, locks and all of the hinges. Place the screws and hardware to take off into the container to avoid losing them.
- Loosening the frame screws. Locate and find the screws that are securing the door frame to the wall of your property. They can usually be found along the tops and sides of the door frame. Using your screwdriver or adjustable wrench you can carefully loosen and then remove these screws.
- Cutting the sealant. You should have a look and inspect the edge of your door frame. There may be some sealant or caulking that has been used to help seal the door frame to the wall. Using your utility knife cut carefully through the sealant so it is easier for you to remove the frame.
- Remove threshold or sill. If you have a threshold or a sill at the bottom of your door, you need to remove it from your door. You can remove it by unscrewing any screws or fasteners that might be holding it in place.
- Prying the frame. Once you have removed the screws and cut the sealant, you can use a pry bar or crowbar to carefully and gently pry the frame away from the wall. You can start at one corner and work your way around the door frame. You need to be cautious to not damage the wall of your house or the frame during this step.
- Lift and remove the door. After you have properly loosened the door frame from the walls you can carefully lift the door and the frame out of the opening in the house. If the door is heavy or too large you may need to ask someone else to help you out with this step.
- Inspect the area & clean. Once you have removed the door and frame, you can inspect the opening and inspect the door and its frame to check for any damage or debris. Cleaning the opening to prepare it for the impending installation of the new door.
- Dispose of the door. You can properly dispose of the old door and frame by adhering to your local regulations. You may be able to use the local land waste site or a specialist place for recycling these materials.
Wooden doors
Removing a wooden door is also a straightforward process and can be done with just a few basic tools. The tools you will need are:
Flathead & Phillips screwdrivers, utility knife, pry bar / crowbar, hammer, safety goggles / gloves / protective gear and a container for screws and hardware.
To start removing your wooden door to make way for a new door you can follow the following steps:
- Removing the hardware. Begin your process by removing the hardware from the door including all of the handles, locks, hinges and the strike plate. Place all of your hardware and screws into the container so as to not lose them.
- Cutting the paint or sealant. Inspecting the edges of the door frame , you may find paint or sealant keeping the doors sealed to the frame and the wall. You can use a utility knife to do this, carefully cutting through the paint and or any sealant that will make it easier to remove the doors.
- Loosening the hinge pins. Most wooden doors you will find are held in place by something called hinge pins. You will need to locate the hinge pins on your door and use a screwdriver to tap them carefully in an upwards motion to gently loosen them. This will release the door from the hinges. You might need to use your hammer to lightly tap at the screwdriver.
- Removing the door. After you’ve removed the hinges you can carefully lift the door off of these hinges. You may need extra help if it is too heavy or large.
- Inspecting and cleaning the door. Inspecting and cleaning the door and the gap after removal to ensure it is clean and prepared for the installation of the new door.
Preparing the new door
To prepare your new uPVC door for installation you should double check its size and style before installation and check the opening size of the brick opening. One thing to remember is that your new door should be around 10 mm smaller both in height and width that the opening you have to install it into.
Another tip to remember is not to leave your new uPVC door panels or glass in direct sunlight. This is because the protective film on the door can merge and stick to the surface of the door.
Ensure that you make the new frame level before installation. Once you have removed the old frame, clear away old mortar and other debris as well as old sealant. After clearing away all of the debris, rest the door’s sill on the brickwork and make sure it is level. You can do this with packers and a spirit level.
You could also inspect your new uPVC door to ensure that it doesn’t have any defects, damage or any kind of / signs of warping. You can check all the edges and make sure they are square and that the door is the perfect size for the opening in the brickwork.
Preparing your hardware is another thing you can do to prepare your door for installation. If the door doesn’t already have pre-drilled holes for the hardware, you will need to mark and drill holes for your hardware such as door handles, locks and other hardware on your door.
Installing the door
Before placing the door into the opening, check that the frame is level and plumb. You can do this by using a spirit level to make sure everything is level, plumb and straight.you can adjust it by using packers or shims.
Apply a sealant to the back of your door frame in the place that the door will come into contact with the wall. This helps to create a watertight and airtight seal to give extra protection and stability to your door & frame.
Then carefully lift up your door and place it into the uPVC door frame opening. You should make sure it fits snugly and properly into the gap and make sure it is level and plumb. You may require a little bit of help with this as the door may be heavy or large.
When you have placed the door into the opening, secure the hinges to the frame. You should make sure that the hinges are properly aligned and securely screwed in place.
Using a spirit level check that the door is properly aligned and in place and make any adjustments you need by placing more or removing packers.
Once you are happy with the alignment of the door, secure it to the wall by driving screws through the frame and into the wall at the proper locations, use the manufacturer's instructions to find these out.
Now that the door is attached and secure, you can install the doors hardware, this includes handles, locks and other accessories like letterboxes, make sure these are all properly aligned and straight for the perfect finish.
After you have completed your installation make sure you test the door opening and closing it to make sure it works properly and is smooth operating.
Then just clean up your excess mess and clean the extra sealant that may have squeezed out between the door frame and the wall in the installation process.
One thing to note after the installation is to allow for the adhesive sealant to cure properly. The typical recommendations are a few hours to a day before using the door, but this can depend on weather and environmental conditions.
Sealing the door
When installing your door, properly sealing it during and after installation is crucial to make sure that it is weatherproof, airtight and secured properly.
Choosing to use a high-quality sealant adhesive that is compatible with uPVC during the installation. You should make sure that it is suitable for outdoor use and that it can withstand weather conditions.
You should apply a continuous bead of sealant to the back of the door frame in the place that it comes into contact with the wall. When applied correctly the sealant should allow for a water and airtight seal between your property and the new door. You should immediately clean up any excess sealant that might have squeezed out between the door frame and the wall during installation for a clean sleek look. You can do this with PVC cleaner and a cloth or just a damp cloth on its own.
After the installation you should inspect the seal to make sure you have not missed anything and that there are no gaps or cracks in the sealant, making sure to look closely at the corners and edges of the door. If you do happen to find any gaps in the sealant or any cracks, or even if the sealant is damaged in any places you can reapply the sealant in these areas, ensure that the area is clean and clear before applying new sealant. You can also check the areas around the hardware to make sure there are no gaps there and add sealant if there are any gaps to ensure an air and watertight seal.
Properly sealing your uPVC door during and after you have installed the door will help you to make sure that it remains weatherproof, watertight and airtight and keeps the door remaining energy efficient. Regular maintenance and swift repairs when they are needed will help to prolong the life of the sealant and the door and help to upkeep the effectiveness of the doors' weatherproof properties.
Finishing touches
After you have installed the uPVC door you can do a few finishing touches and additional steps to make sure your door is perfectly installed and looking sleek, aesthetic and fits into your home’s appearance. Some of the finish touches you can do include:
- Trimming. Installing an interior and exterior trim around the doors frame to cover any gaps or rougher edges. This trimming can help to enhance the look of your door and gives your door more of a finished look.
- Weatherstripping. Installing weatherdripping can help to improve the doors' energy efficiency and prevent drafts.
- Threshold installation. If your door requires a threshold or a sill then you should make sure that this is installed properly and sealed properly to ensure that there is no water infiltration in the door.
- Decorative elements. You can add an array of decorative elements to your door to make it more aesthetically pleasing such as a door knocker house numbers or decorative glass inserts to personalise your door and ensure that its aesthetics fit into the aesthetics of your home.
These are just a few finishing touches you can do to enhance the functionality, durability and aesthetics of your new uPVC door.
The benefits of professional installation
Hiring professionals like us to install your uPVC door does give you several extra benefits and ensures that your door is installed properly, correctly and efficiently. Some of the advantages of getting a uPVC door installed by professionals includes:
- Expertise and experience. Professional fitters have the necessary knowledge, training and experience to fit a uPVC door effectively. Fitters are more than familiar with the different doors, styles and techniques to install the door you want at a high level of quality and are highly competent in their work.
- As professionals we will accurately measure the opening and make sure that all measurements are accurate and perfect to make installation seamless.
- High quality workmanship. Our fitters are highly skilled. From making sure the door frame is plumb and level and also to make sure the door and the frame are properly sealed and waterproof.
- Guarantee. Here at ETC we offer a guarantee on our installations. Should a problem arise relating to one of our installations, we will come out and fix it for you free of charge.
Although hiring a professional fitter to install your door does come with a cost, the benefits of expertise, efficiency, professionalism and peace of mind does outweigh the cost. Having us as professional fitters to install your door will allow you to rest assured knowing that your door operates well, its energy efficiency is optimal and it will have a long lifespan.
Conclusion
To conclude our article, fitting your own uPVC door can be a success and enhance your home's aesthetics and energy efficiency.
This article has explored the different steps, measures and tools for installing a uPVC door.
It can be difficult to achieve all of these steps efficiently and professionally. Professional fitters such as ourselves have the expertise, knowledge, experience and training to install your door flawlessly and with an added guarantee after the installation is completed. With most cases of door installation the benefits often outweigh the costs when hiring professionals.
Transform Your Entryway with Our uPVC Doors
Discover a door that complements the aesthetic of your home while providing unmatched durability and energy efficiency. Our uPVC doors at ETC Team are crafted for modern living, ensuring a harmonious blend of security, elegance, and sustainability. Whether you are self-installing or seeking professional fitting, our doors come with the promise of longevity and low maintenance. The journey towards a stunning and secure entrance begins here. Delve into our range of uPVC doors, designed for the discerning homeowner.
